


MeasureBox GSM Temperature, HumIdIty, LIght and Impact Datalogger
MeasureBox
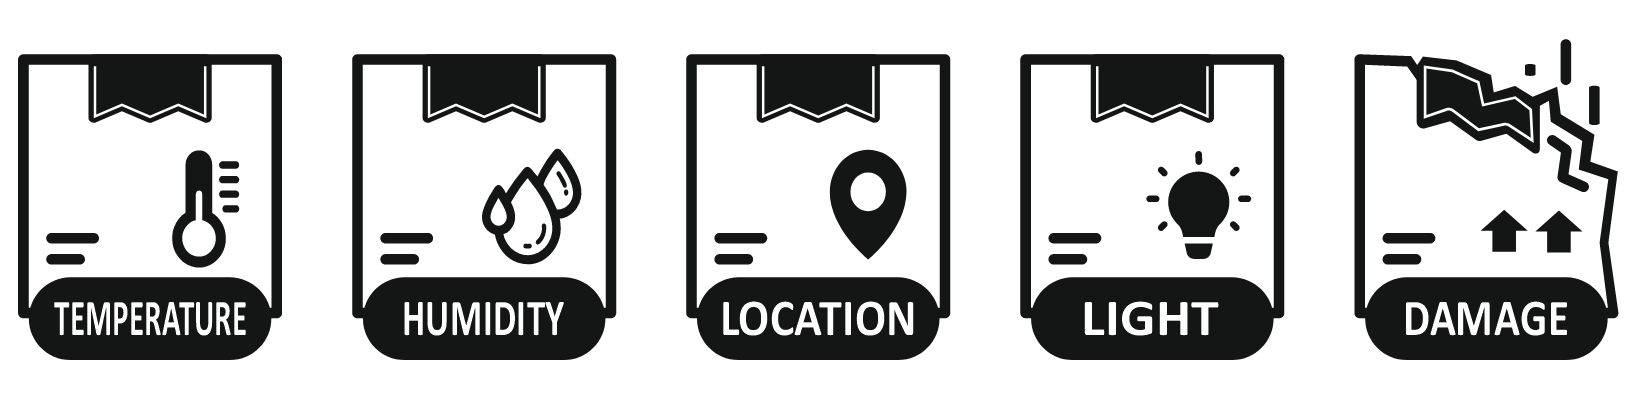
MeasureBox is an advanced monitoring and data management platform developed for logistics operations that are highly sensitive to environmental conditions, including cold chain, pharmaceutical, food, fresh fruit and vegetable, and animal-based product transportation. Throughout the shipment, it continuously measures critical parameters such as temperature, humidity, light, shock, tilt, and location, ensuring product integrity, shelf life, and regulatory compliance. With its robust communication infrastructure, all data is transmitted securely, and processes can be monitored in real time.
In the transportation of pharmaceuticals, biological products, and perishable foods, even minor environmental deviations can seriously compromise product integrity, patient safety, and food safety. MeasureBox helps identify these risks before they occur through user-defined alarm thresholds and real-time notification mechanisms. When temperature, humidity, or other environmental conditions exceed predefined limits, users are instantly alerted, enabling rapid and accurate intervention to minimize product loss, spoilage, and recall risks. Automatically generated detailed reports provide a strong and reliable documentation framework for auditing, quality assurance, and regulatory compliance processes.
In fresh fruit, vegetable, and animal-based product transportation, not only measurement but also physical security and correct handling conditions are critically important. MeasureBox can detect unauthorized opening of packaging, crates, doors, or containers through its light sensor. With shock and tilt monitoring capabilities, impacts, tipping events, and improper loading or handling conditions during transportation are recorded. This multi-layered monitoring approach provides an additional level of security and transparency, particularly for the transportation of high-value, sensitive, and perishable goods.
The cloud-based MeasureBox platform enables all shipments to be easily managed from a single centralized system. Real-time location tracking and intelligent alert systems reduce uncertainty in transportation operations and accelerate decision-making processes. With advanced data analytics and user-friendly dashboards, processes are continuously monitored and optimized, lowering operational costs while increasing customer satisfaction, brand reliability, and supply chain sustainability. MeasureBox delivers a powerful digital solution that protects quality, manages risk, and ensures long-term trust across all sensitive logistics operations—from pharmaceuticals and food to fresh produce and animal-based products.
Technicial Specifications


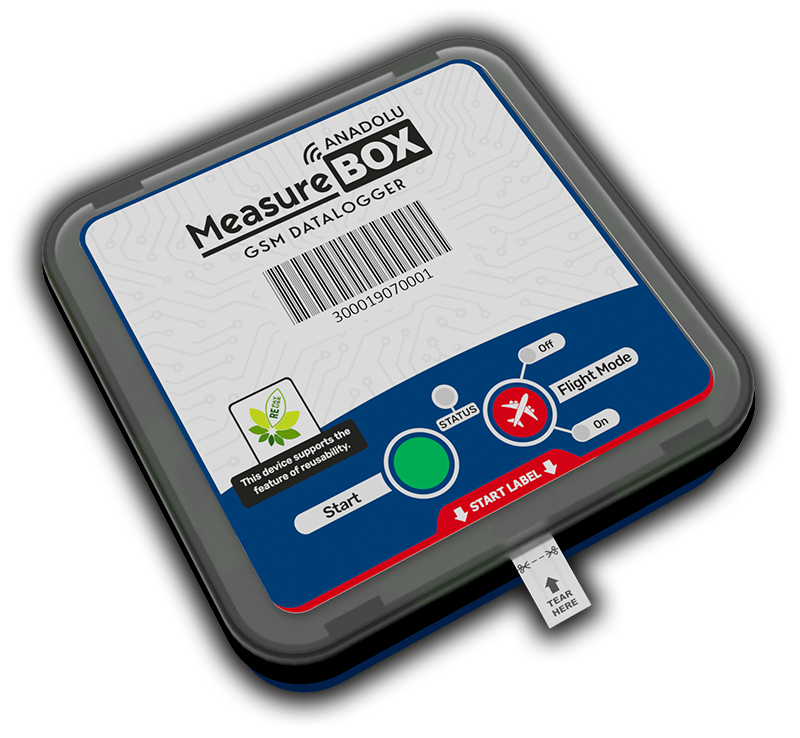
When the Activation Strip located on the bottom of the device is torn by the user, the device is automatically activated and data logging begins. This design enables a fast and reliable start before shipment without the need to press any buttons or configure software settings.
This practical and user-friendly mechanism offers a significant advantage, especially in cold chain, pharmaceutical, and food transportation operations. It minimizes user-related errors and ensures that data recording starts at the correct time and in the correct manner.

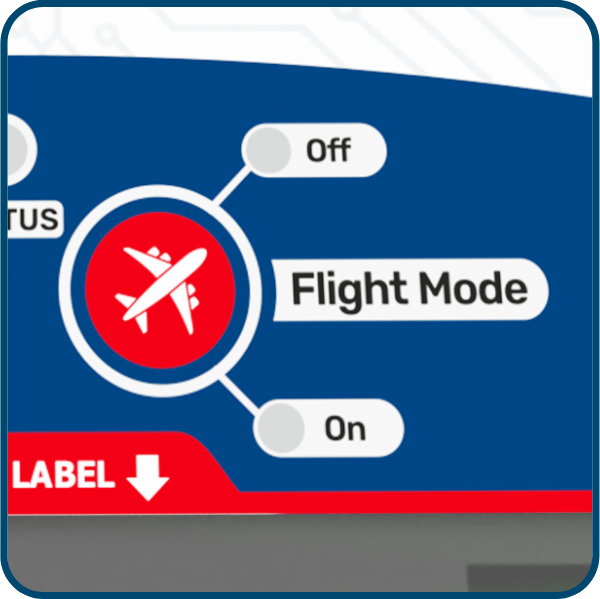
When Flight Mode is activated, the device fully disables GSM communication in compliance with aviation regulations. However, data logging continues uninterrupted; temperature, humidity, and other sensor measurements are recorded continuously. Once Flight Mode is deactivated after the flight, all recorded data is automatically transmitted.
This functionality allows MeasureBox to combine safe air transportation, regulatory compliance, and continuous data recording in a single solution.

RE PAY – RE USE represents MeasureBox’s reusable and sustainable business model. After a shipment is completed, the device can be reactivated through a renewal payment and safely reused for subsequent shipments. This eliminates the need to purchase a new device for every shipment, significantly reducing operational costs and enabling more efficient budget planning.
This approach also reduces device consumption, helps minimize electronic waste, and supports environmentally responsible and sustainable logistics operations.
Model Comparison Table


Ease of Use
It is extremely easy to start the registration process and report the Recording.
Cloud storage
All device data is stored in a secure cloud environment
Create a user
Users can be identified by creating a user-specific device through the System.
7/24 Access
You can access all device data from anywhere in the 7/24.
CalIbratIon CertIfIcate
Each device has a special calibration certificate and can be downloaded via the system.
HIgh SecurIty
The data inside the device cannot be altered by external interference.
Instant Alerts
Alarm states are forwarded to the user with push notifications.
Advanced reportIng
PDF, Excel, Graphical and Table format can be reporting in the desired date Range.
7/24 Easy access and reporting from all devices.

How does It work?
1
2
3
4

1
MeasureBox Instantly transfers the temperature value and location information to the cloud storage center using the GSM infrastructure.
2
The data transferred to the High-security Cloud storage Center is processed here and made available for transmission to Users.
* The storage process uses the Microsoft Azure infrastructure.
3
Users with a computer connected to the Internet from www.measurebox.online page, can track anytime 7/24, temperature and location data by entering the device number in the corresponding box.
4
The entire process can be monitored via mobile application at 7/24. In any alarm situation, the user is notified instantly with instant Notifications.
Warning: MeasureBox uses the GSM infrastructure for data and location Transmission. Instant distress may occur when submitting data and location information according to geographical and weather conditions, the device will continue to register in these cases and when it receives the GSM signal again, it will send all data lossless to the CLOUD.
How to use.?
START TO REGISTRATION PROCESS
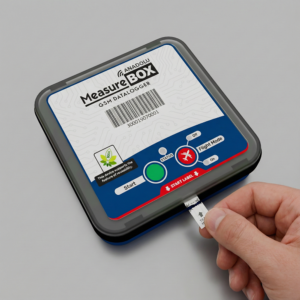
To start the recording process, tear off the activation strip on the device.
How to Use Flight Mode
-
Press and hold the Flight Mode control area on the device for 5 seconds.
-
If the OFF LED is lit, Flight Mode is disabled.
-
If the ON LED is lit, Flight Mode is enabled.
-
-
Continue holding for an additional 10 seconds.
-
The Flight Mode status will change.
-
The LED corresponding to the selected mode (ON or OFF) will light up to indicate the new status.
-
When Flight Mode Is Enabled
-
GSM communication is disabled in compliance with aviation regulations.
-
Data logging continues uninterrupted.
When Flight Mode Is Disabled
-
All data recorded during the flight is automatically transmitted.
This feature ensures safe air transportation, regulatory compliance, and continuous data logging.
Reviewing Saved Data
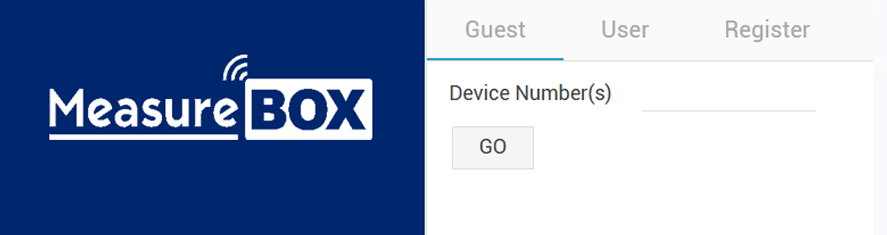
To access the data of the device that worked, please login to www.temploggo.com from the browser you are Using.

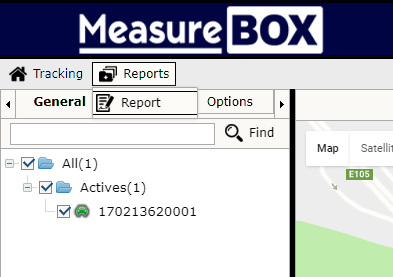
On the opening page, click the GO button by typing the barcode number in the device number field on the bottom of the Device.
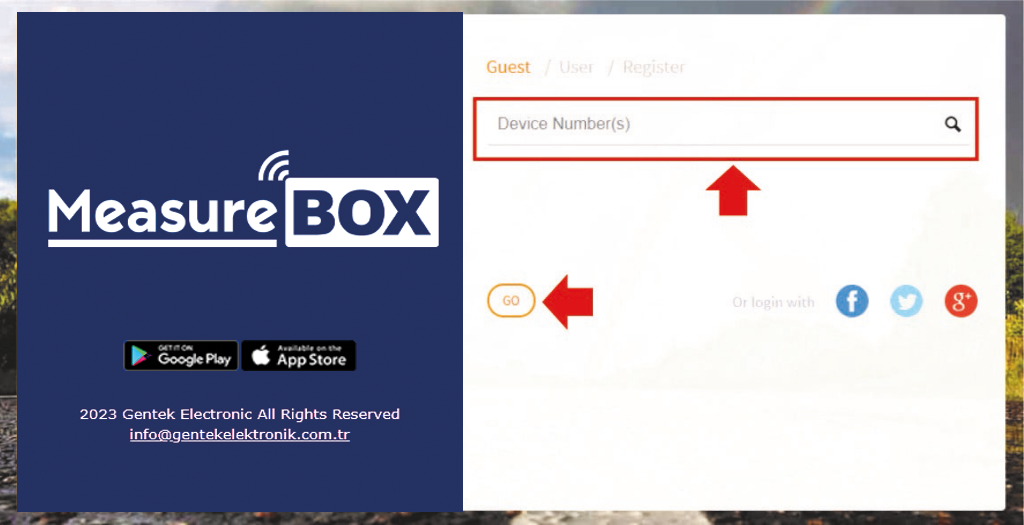
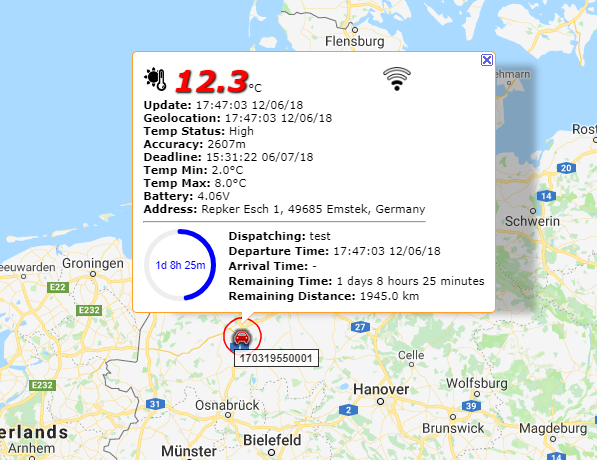
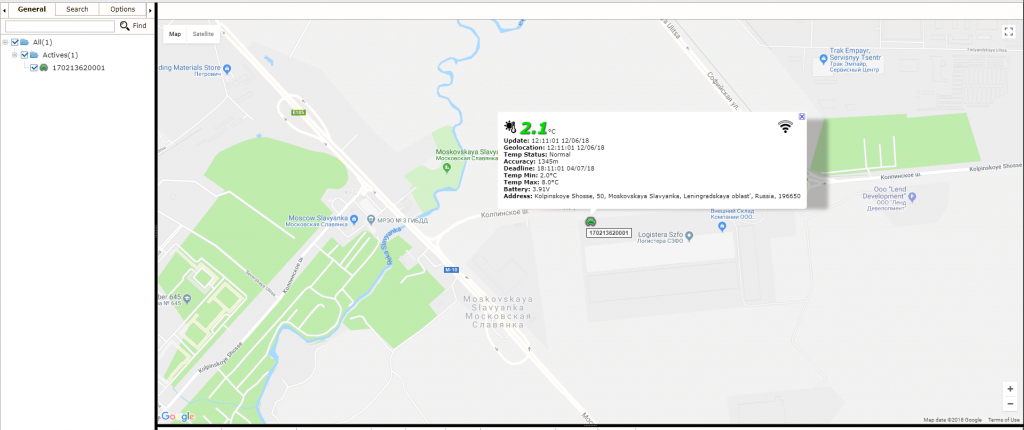
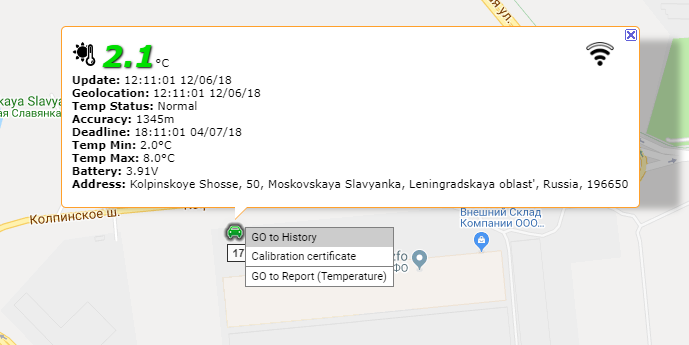
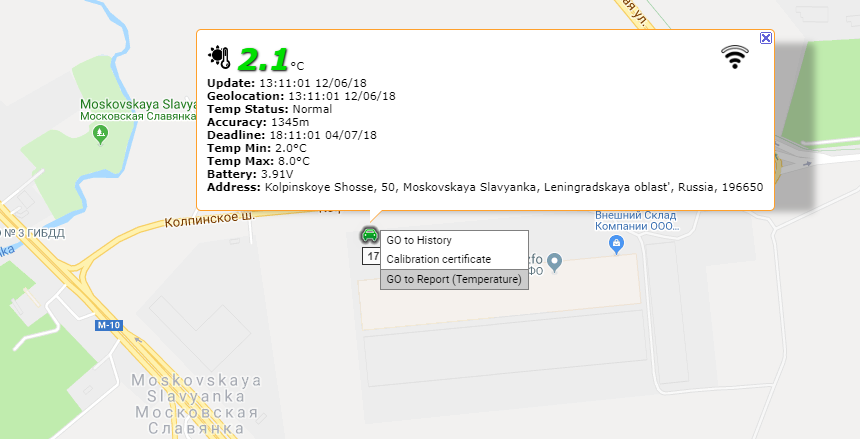
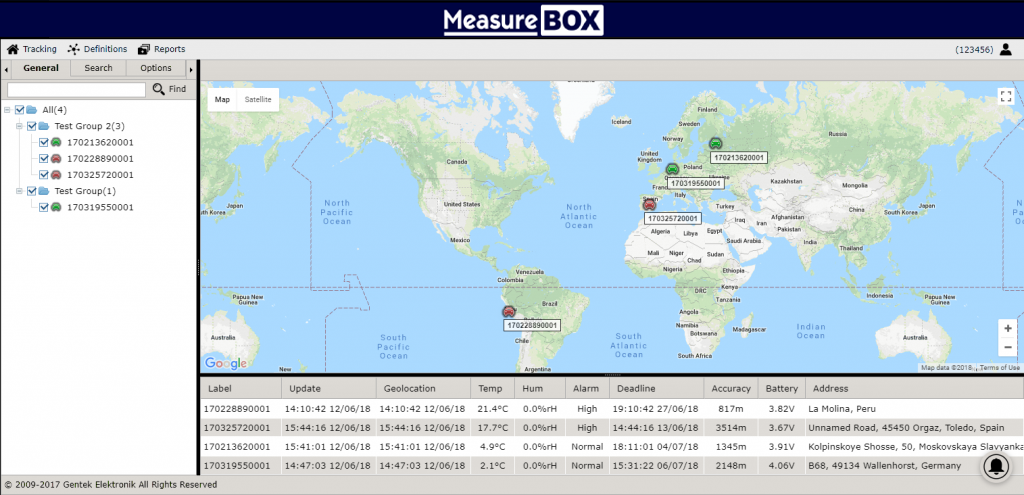
The final position of the device and the screen with the instantaneous temperature values will be seen.
To access the Device’s past location and temperature data, Right-click on the tool on the map and in the window that opens GO to History Button.
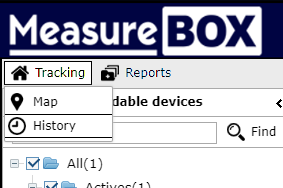
This process can also be done with the History button under the Tracking tab on the top left.
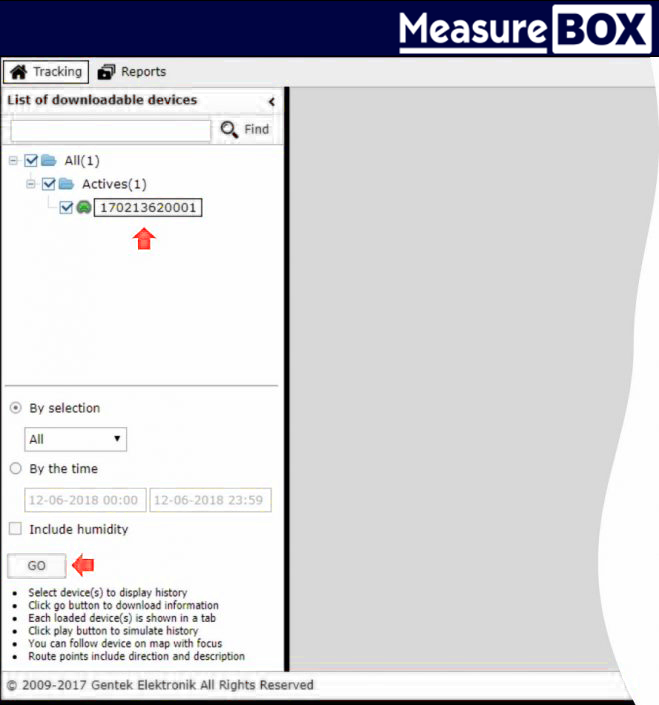
The device number will automatically be selected on the page that appears. Clicking on the GO button will open the screen where the Device’s history records are Located. Optionally, You can customize the history records by selecting only a specific date range on the same page or by filtering the last 10, 100, 1000 records.
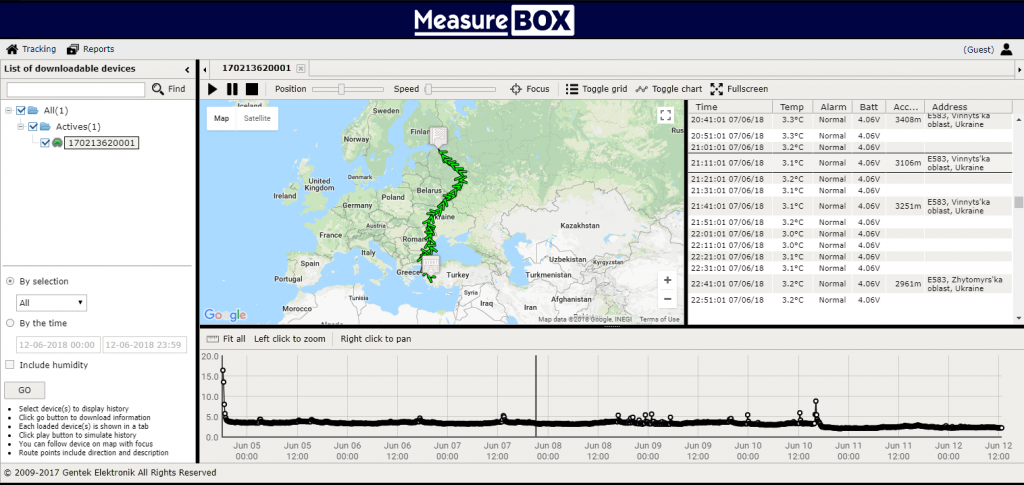
PAST records Screen
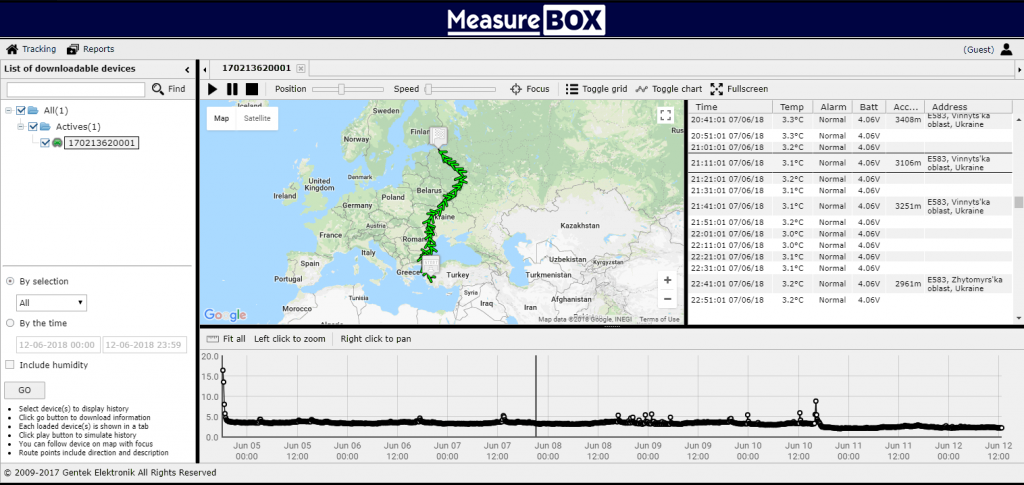
The past records screen generally consists of 3 parts.
Map screen
This section displays the entire route that the device follows.
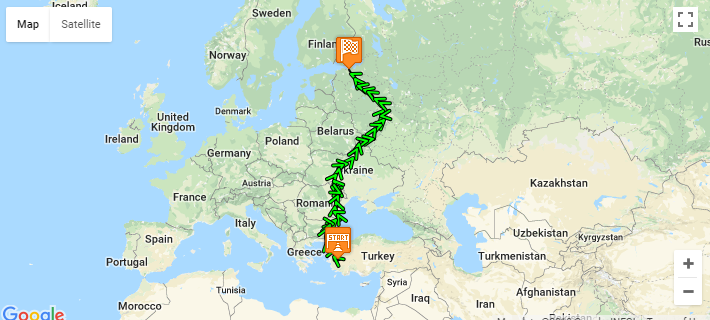
The + and – buttons on the bottom right can be zoomed in and out.
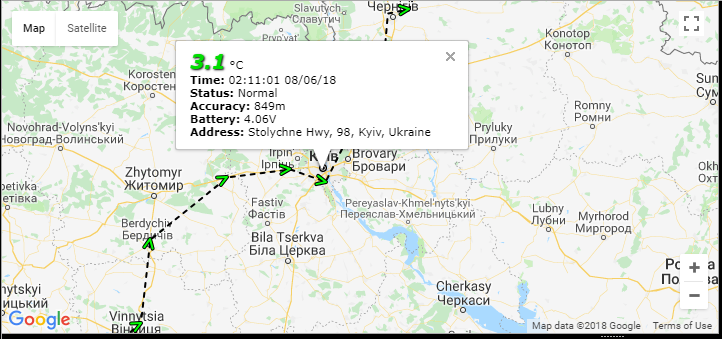
Click on the OK icon at the zoom point to find information about the location of the device and the temperature values.
The map can be viewed as full screen on the PC screen by clicking on the square icon in the top right.
The map and satellite buttons on the top left can be switched between satellite or map Views.
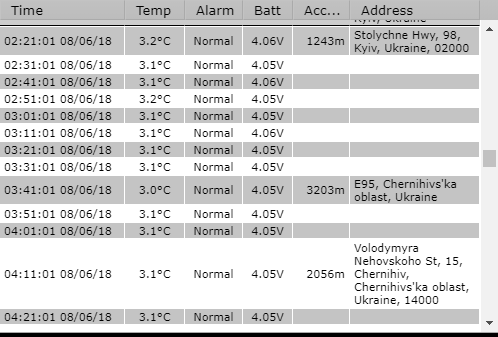
Display as a List
On the list screen, all the records the device receives are shown as a List.
Graphic display
All recordings are displayed graphically on this Screen.

You can zoom in on the graph by selecting it with the left mouse button and Scanning.

Each circle on the chart represents the time that the record was received, and the current temperature and date information is displayed when clicked On. It also shows the location on the map.

Reporting past records
To report the Device’s past location and temperature data, Right-click on the tool of the map and in the opening window GO to Report Button.
This operation is located at the top left Reports tab under Report Button.
The device number will automatically be selected on the page that appears
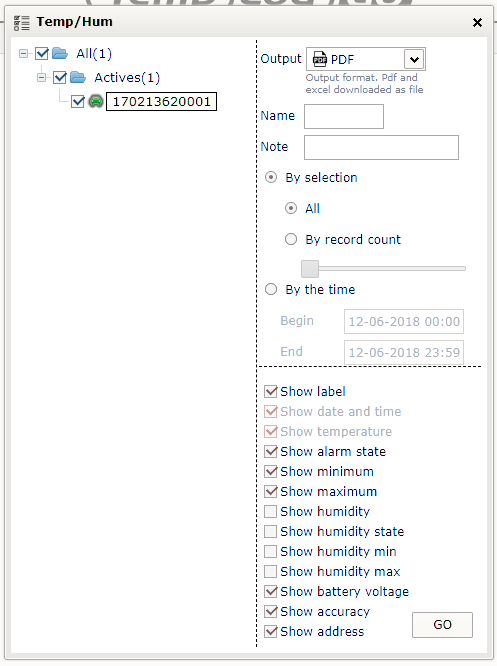
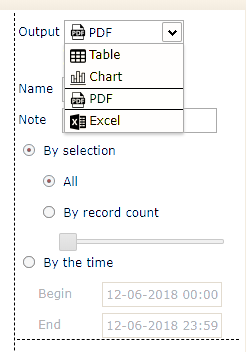
Reports can be created in PDF, Graphics, Tables, and Excel Formats.
You can also optionally add names and notes to your report and customize your report by selecting the desired time Range.
When you click GO button, the device report will automatically be downloaded to your computer.
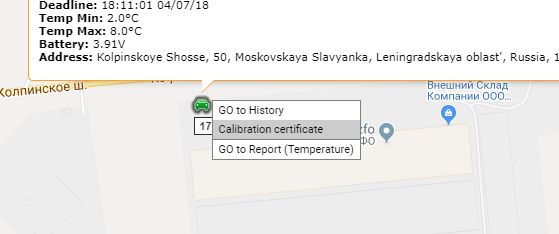
Calibration Certificate
Each device has a special calibration Certificate.
To download the calibration document, Right-click on the tool on the map and click the Calibration Certificate button in the opening window.
The calibration document will automatically be downloaded to your computer.
User creation and its benefits
www.measurebox.online allows you to create a username and easily monitor your devices by signing in with this User.
Creating users allows you to track multiple devices on the same screen, group them into your alarm identification, and get the device to the user by instantaneous alerts.
To create a user www.measurebox.online Login to the Site.

Click the Register tab to complete the form and click the GO button.
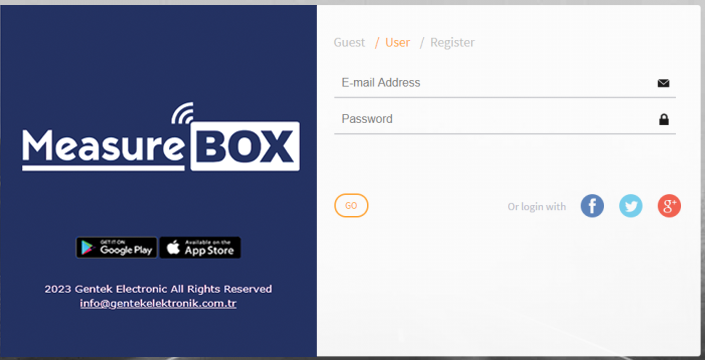
After registration you can login with your email address and password by selecting the USER tab.
Add a device to your account (must be logged in)
The first time you sign in, you need to add a device to your Account.
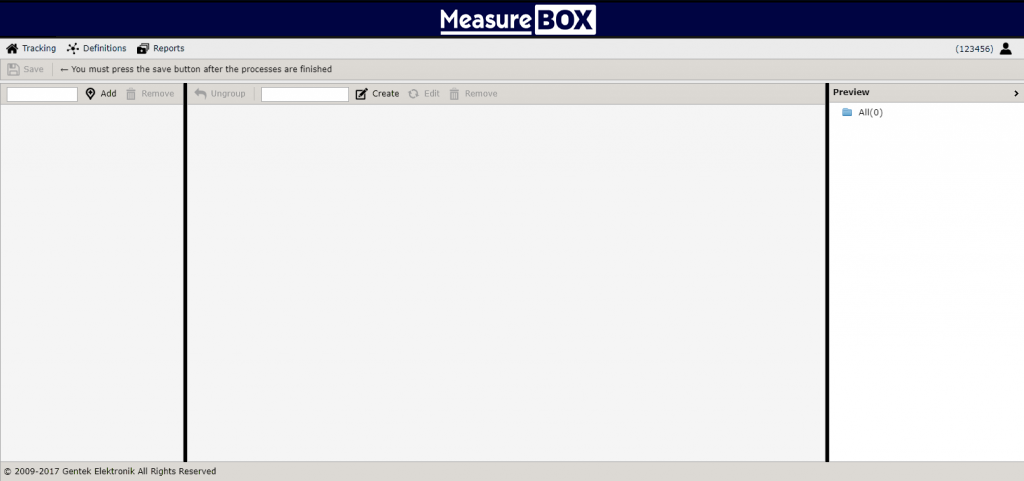
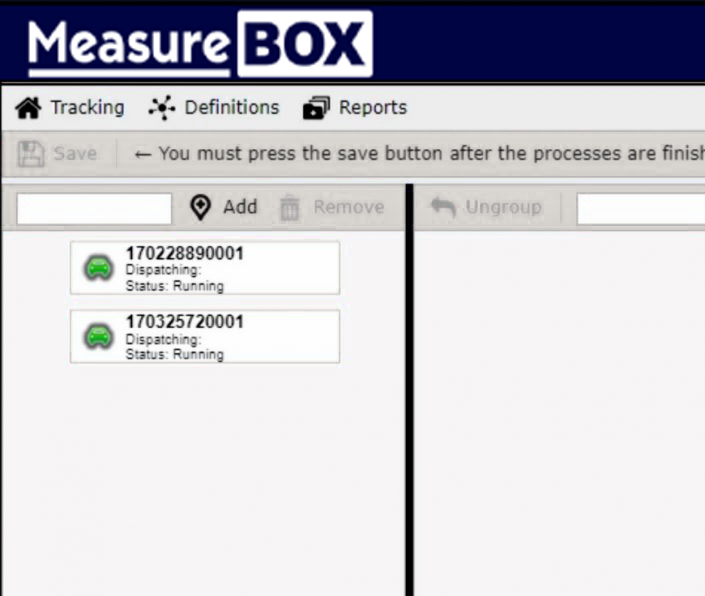
Type your device number in the # 1 field on the top left and click the ADD button. You can add as many devices as you need.
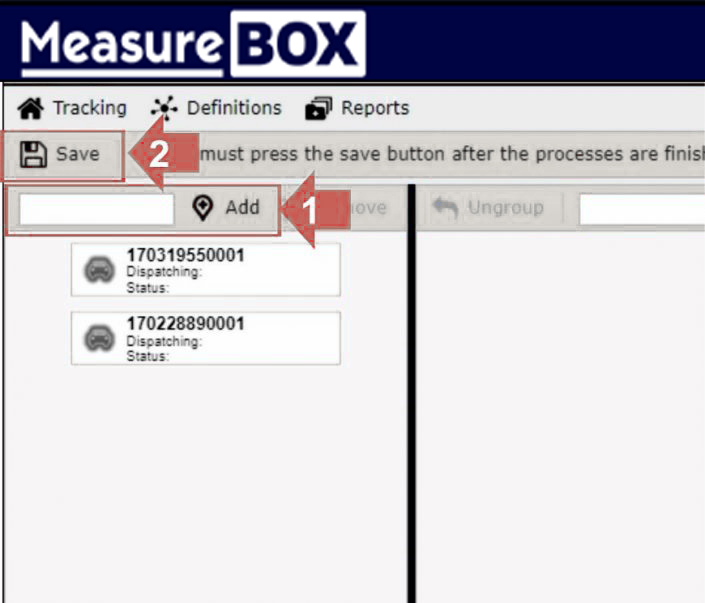
After adding a device, Click the Save button in area 2 to complete the registration PROCESS.
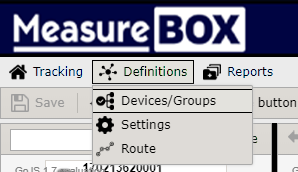
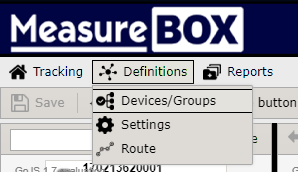
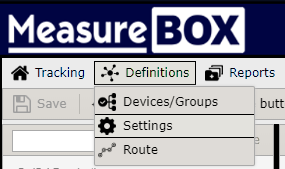
You can access the Add Device page at any time by clicking the Devices/GROUPS button at the top left of the Definitions tab.
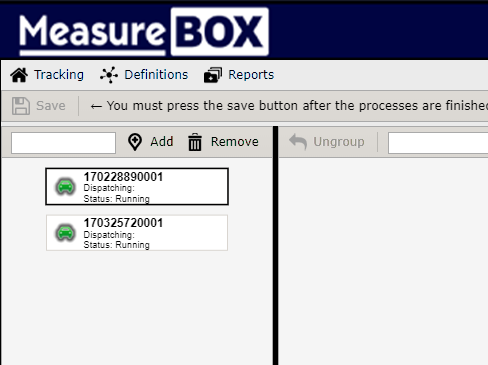
The next time when you add a device to your account, all your devices will appear on one screen as follows.
Delete a device from your account (must be logged in)
To delete a device registered to your account Click the Devices/GROUPS button at the top left of the Definitions tab.
Click on the device you want to delete and click REMOVE button, then click SAVE to terminate the Process. Warning: you need to know the device number to add the device again, the deleted device cannot be restored again if you don’t know the number.
Create groups and add devices to the groups (must be logged in)
Click the Devices/GROUPS button at the top left of the Definitions tab.
On the opening page, type the group name you want to create in field 1 and press CREATE button.
You can create as many groups as you wish.

Then click the SAVE button to complete the group creation Process.
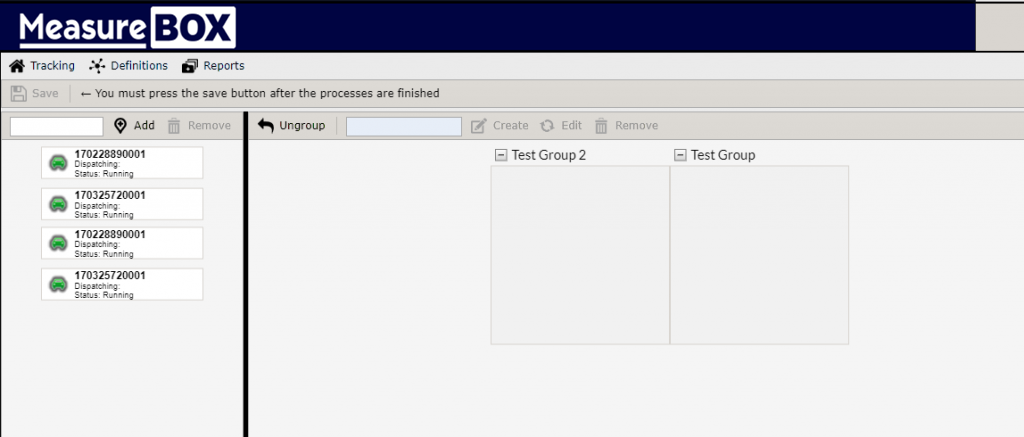
Adding a device to the created groups, drag and drop the device you want to add to the left of the screen to immerse it in the group you Created.
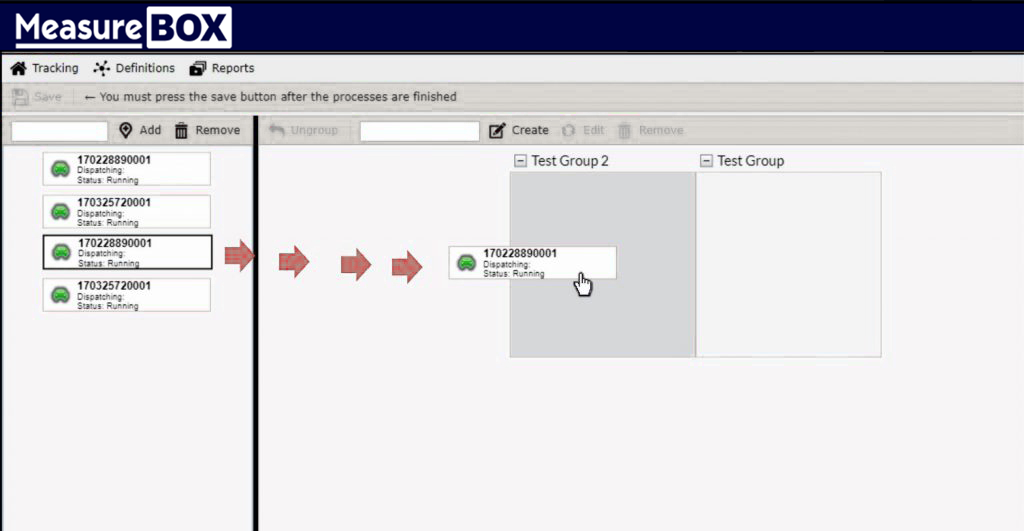
You can add as many devices to groups as you want, at the end of the process, click the SAVE button at the top left to complete the ADD process.

ALARM and NAME identification on device (must be logged in)
You can define and name the desired alarm values for the devices you add to your Account.
Click the SETTINGS button under the Definitions tab at the top left.
The device list screen will open.
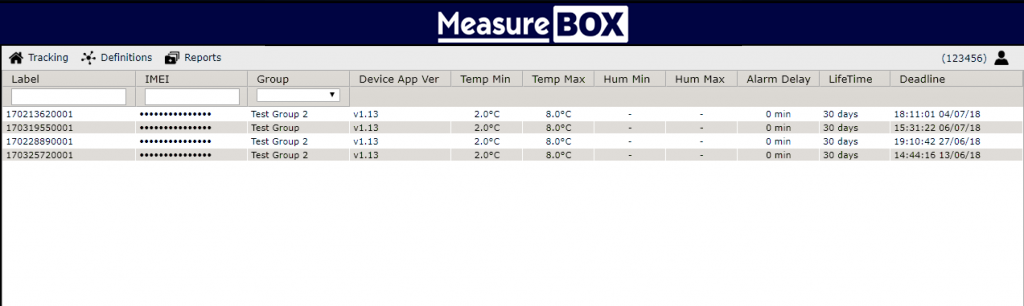
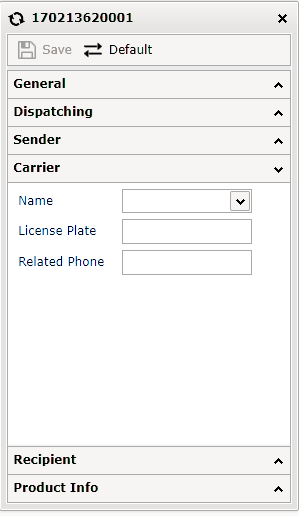
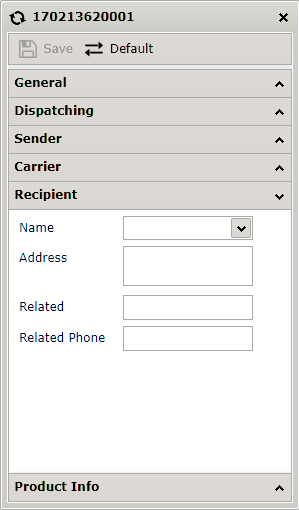
Open the Setup window by double-clicking on the device you want to change settings for.
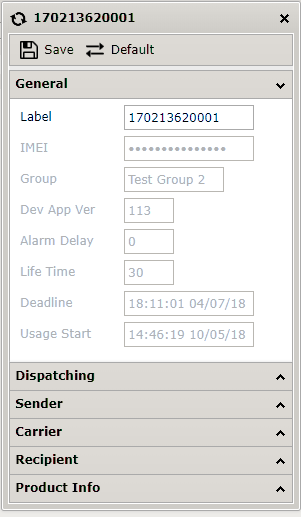
The adjustment Change window consists of 6 different tabs
The General tab contains information about the Device.
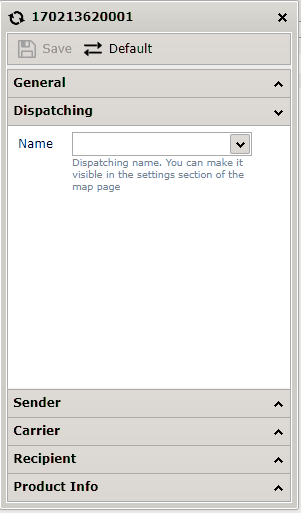
Shipping tab: You can name the device in this FIELD. The name you provide will be displayed easily monitoring the device on the home Screen.
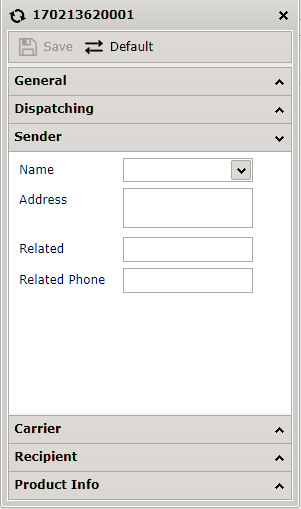
Sender tab: This field can be written to the sender information by Request.
Carrier tab: This field can be written to the carrier information by Request.
Recipient tab: This field can be written according to the optional recipient Information.
Product Information Tab: The product information that is shipped can be written to this field.
You can also enter the minimum and maximum temperature alarm values that you want to be adjusted from this tab in the alarm values.
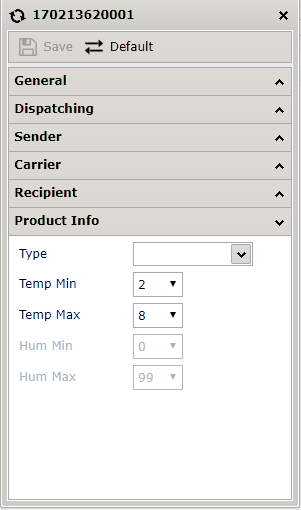
After the necessary changes are made, you can complete the process by clicking the SAVE button on the top left.
Device Alerts (instant Notification) To activate. (must be logged in)
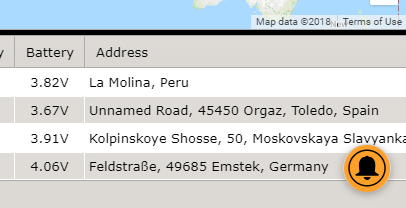
To receive instant notifications over a computer, you must also subscribe to notifications by clicking the RING icon at the bottom right of the home Screen.
You receive instant notification in the following situations.
*When the low-temperature alarm goes into position
*When the high temperature alarm goes into position
*When the Alarm goes out (when the temperature returns to Normal)
*When a device that has not started STARTS
*When the device reaches a designated target or any control point on the road
Note: if your Android or iOS app is installed and signed in with your username, notifications are instantly forwarded to your PHONE.
Create a route and destination. (must be logged In)
By creating a pre-arrival and checkpoints, you will receive instant notification when the device reaches these points and you can find out the estimated time of arrival.
Click the ROUTE button at the bottom of the left Top tab to open the Create route Page.
To open the Create a route page, click the route button under the top left-hand tab.
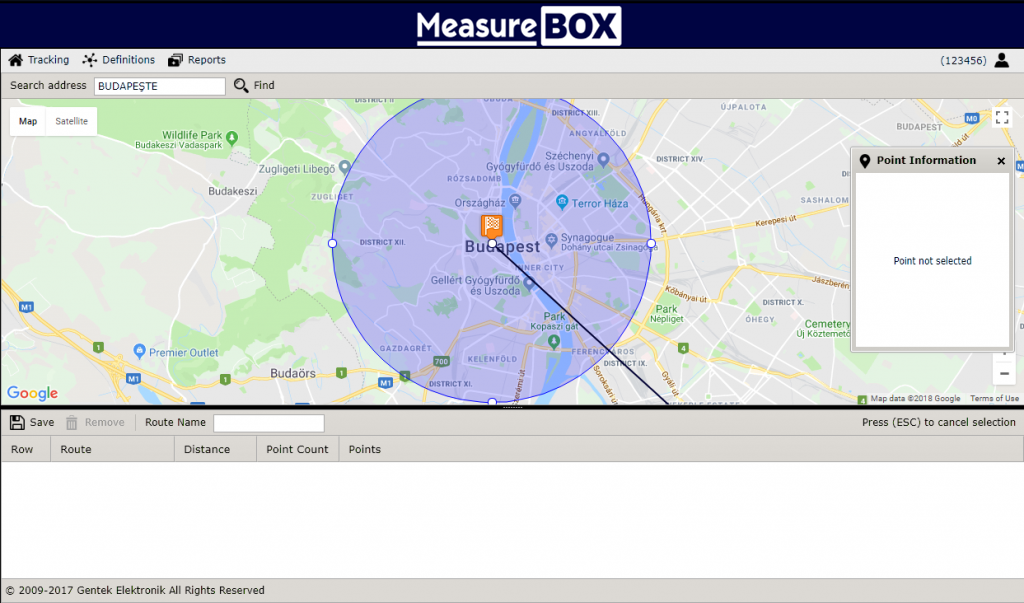
For example, lets imagine that we have a Route starting from Istanbul will also end Budapest, Berlin, Paris and Madrid.
On the opening page, search in the top left by typing Istanbul that is the starting point.
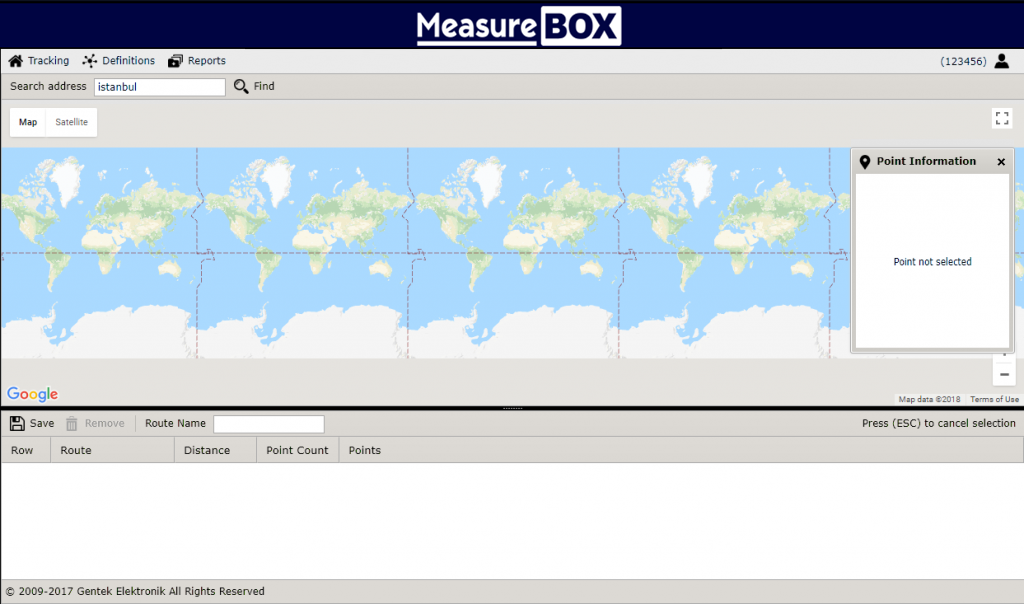
The search will show a map of the city center of Istanbul. You can magnicide the map with the middle key of the mouse or the + and – symbols located at the bottom right.
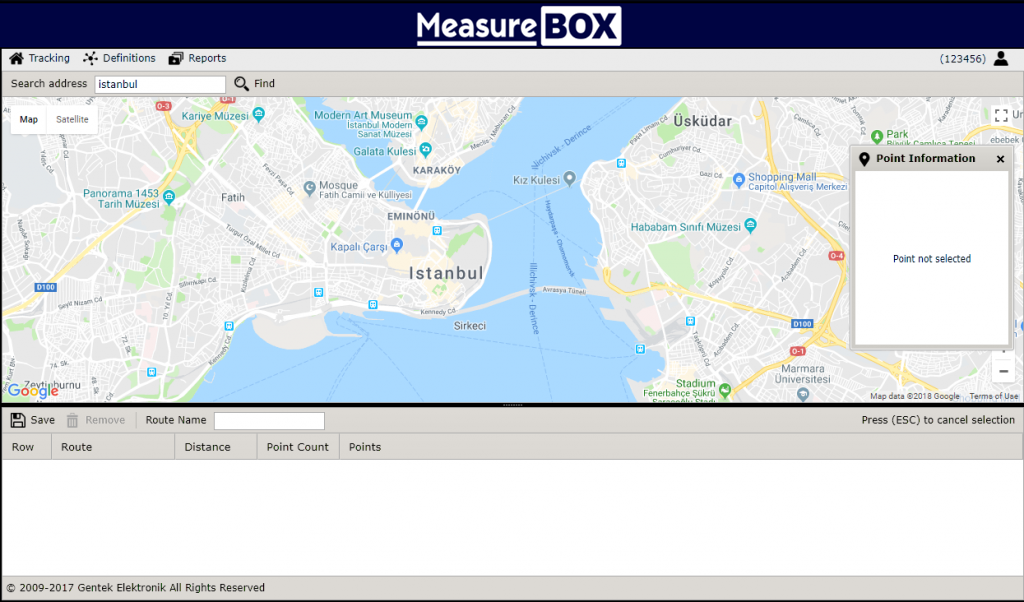
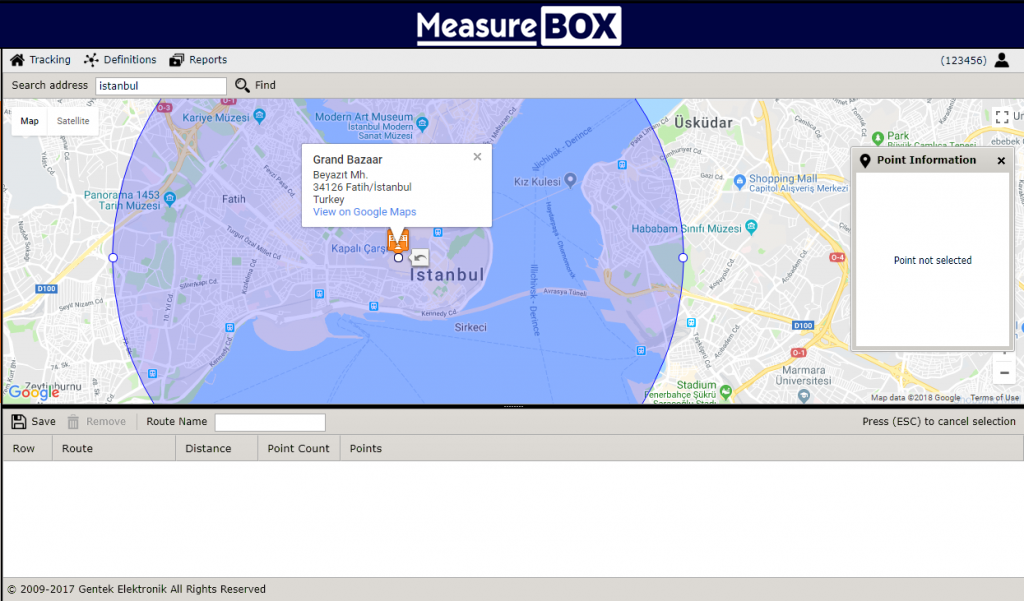
Select a starting point by clicking the left mouse button at the starting point of the route you have specified.
For the second destination point write Budapest inside the Search the box.
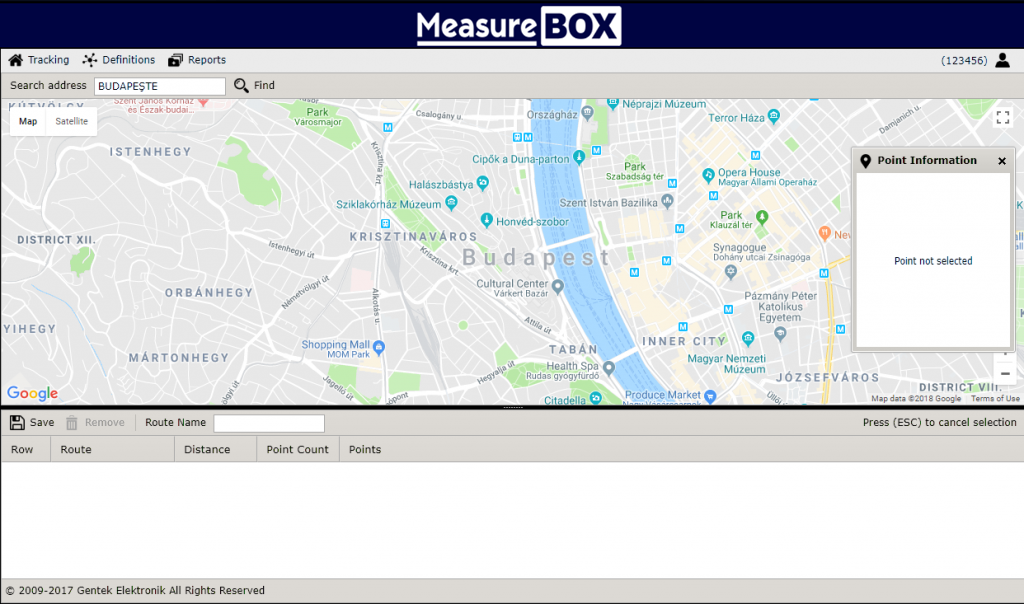
Create second destination point by clicking on the location you Wish.
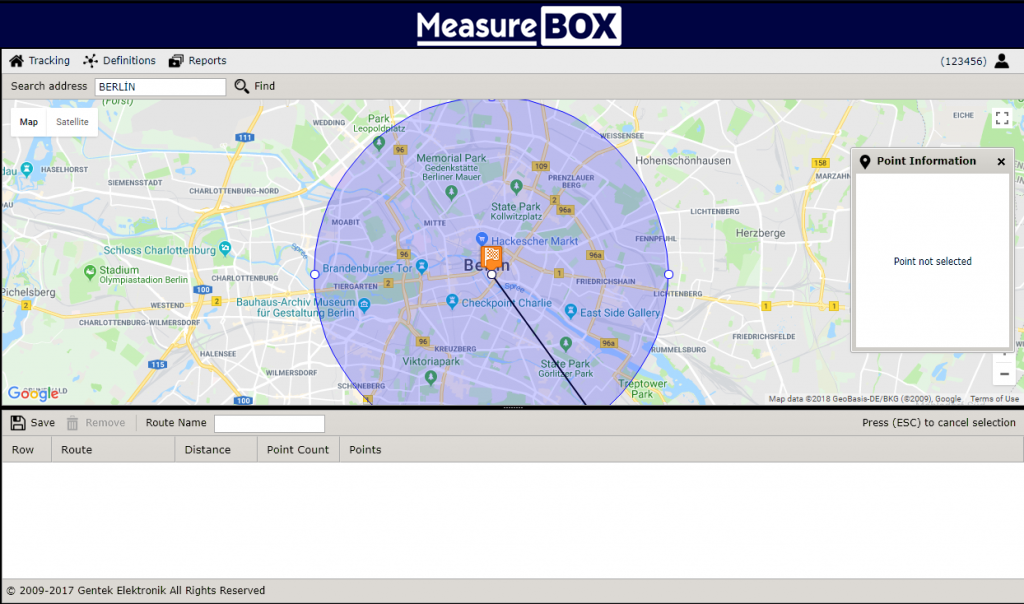
- Search for the destination by typing in the box in Berlin and specify the destination point by clicking the desired area.
To identify 4. destination by typing Paris into the SEARCH box and by clicking desired area specify the 4. destination Point.

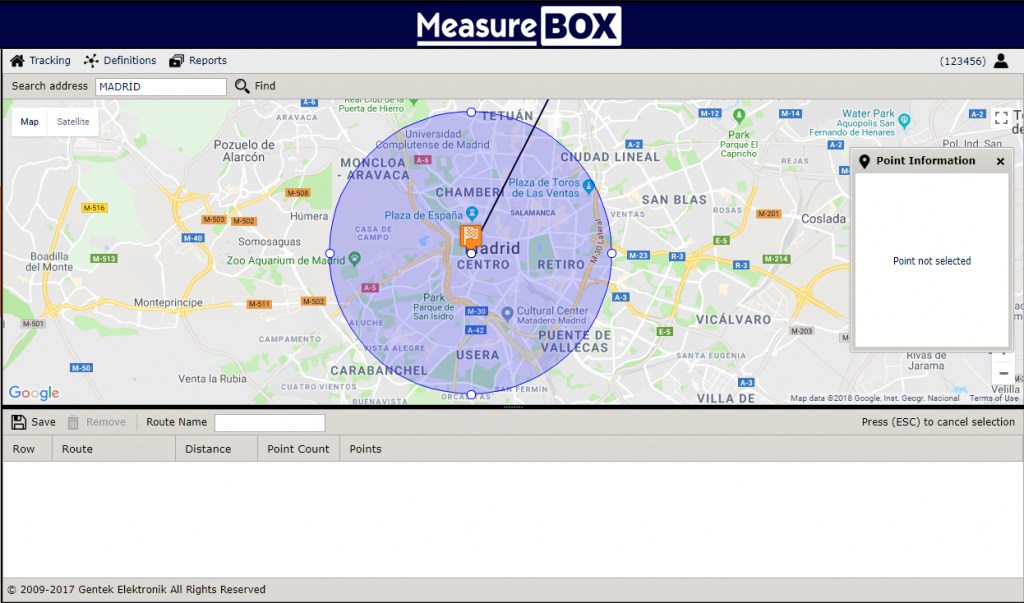
By typing Madrid into the SEARCH box identify the last destination and click on desired area on Map to identify final Location
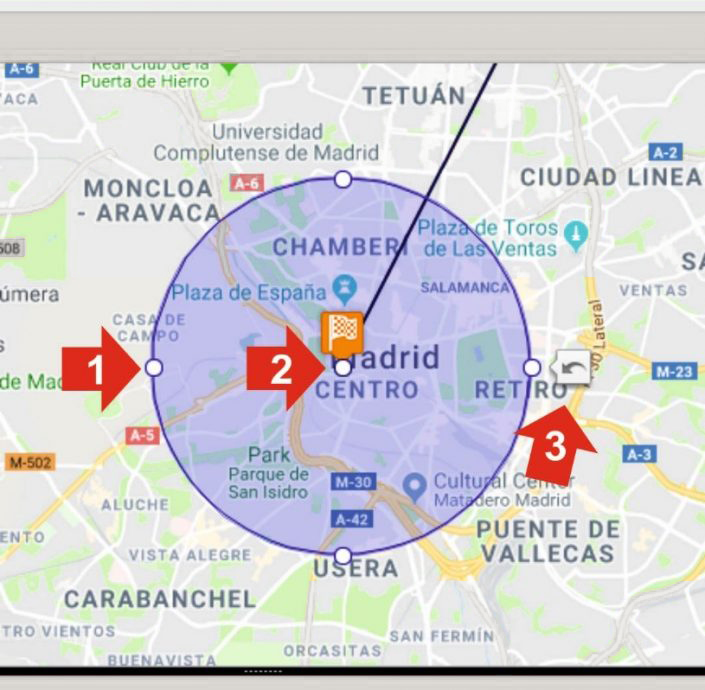
By default, each added point determine 5000mt/radius circle area, to shrink or enlarge this diameter, you can magnify or shrink the fields shown by the number 1 arrow on the four sides of the circle using the Mouse.
You can move the area you want with the mouse by using the field shown with arrow 2 to change the location of the field you have Selected.
Click the undo icon shown with Arrow 3 to undo the Action.
To completely erase the destination point, click the right mouse button to enter the field shown by Arrow2.
When the map is enlarged, it will be seen as follows.
To name the selected points, click on the point where you want to name, and then type the desired name in the field indicated by arrow number 1 on the Right. You can do this separately for each point. The names given to the points will also be displayed to the User.
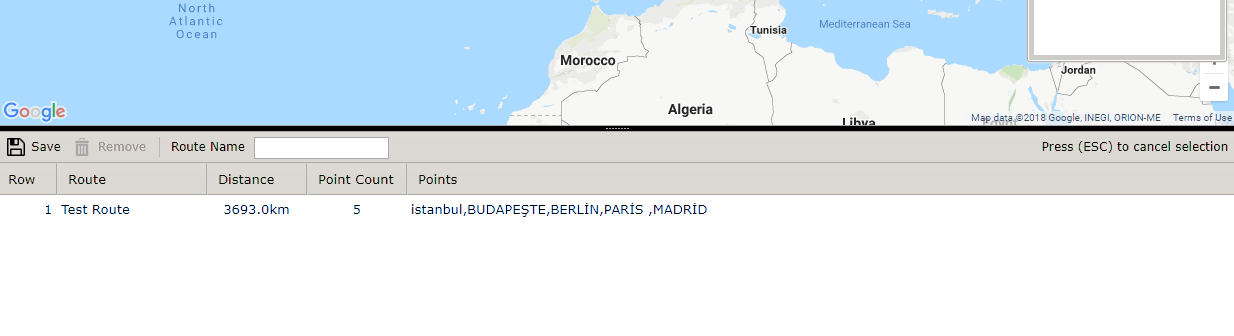
When all transactions are finished, click the SAVE button shown with arrow number 3 by typing a name for your route in the field shown by Arrow 2.

The specified route will be created as Follows.
You can add and edit any number of Routes.
Identifying the route to the device
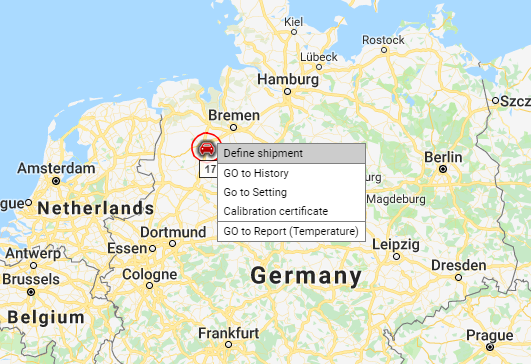
To define a pre-set route to the device, right-click the device on the home screen to add a route on the map, then press the tab DEFINE SHIPMENT Button.
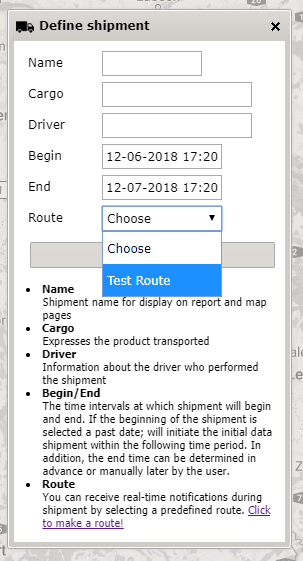
In the window that opens, fill in all fields according to the request if there is a special start date, the device will calculate the route on the specified Date. If left blank, the shipment is counted in the first position it first received.
Click the GO button by selecting the route previously created from the route Section.
When the device that has been defined for shipment (Route) is clicked on the home screen, data such as estimated arrival time and remaining km are SHOWN.